Finding the perfect dress shirt hinges on understanding your unique dimensions; a well-fitted shirt elevates your entire look and boosts confidence.
Lulus and Nordstrom offer diverse styles, while size charts are crucial for online shopping, ensuring a comfortable and stylish fit for every occasion.
Accurate measurements prevent costly returns and frustration, leading to a wardrobe filled with shirts that truly flatter your physique and lifestyle.
Why Accurate Measurements Matter
Precise dress shirt measurements are paramount for achieving a polished and professional appearance, moving beyond simply avoiding ill-fitting garments. A correctly sized shirt dramatically enhances your overall silhouette, projecting confidence and attention to detail.
Incorrect measurements often lead to discomfort, restricting movement and hindering a natural range of motion throughout the day. This is especially crucial for daily-wear dresses, as highlighted by sources like Lulus, which emphasize comfort and fluid movement.
Furthermore, accurate sizing minimizes the need for costly alterations or frustrating returns, saving both time and money. Whether browsing Macys’ diverse range or exploring options on Nordstrom.com, knowing your measurements streamlines the shopping experience.
Investing time in obtaining accurate measurements ensures a better fit, extending the lifespan of your shirts and maximizing your wardrobe’s potential. It’s about more than just size; it’s about investing in quality and personal style.
Tools You’ll Need for Measuring
Accurate dress shirt measurements require minimal, readily available tools, prioritizing precision over complexity. A flexible measuring tape is the most essential item; ensure it’s made of a non-stretch material for reliable results. Avoid metal tapes, as they lack the necessary flexibility to conform to body contours.
A full-length mirror is highly recommended, allowing you to observe your posture and ensure the tape measure remains level during the process. Having a second person assist can significantly improve accuracy, particularly for back measurements.
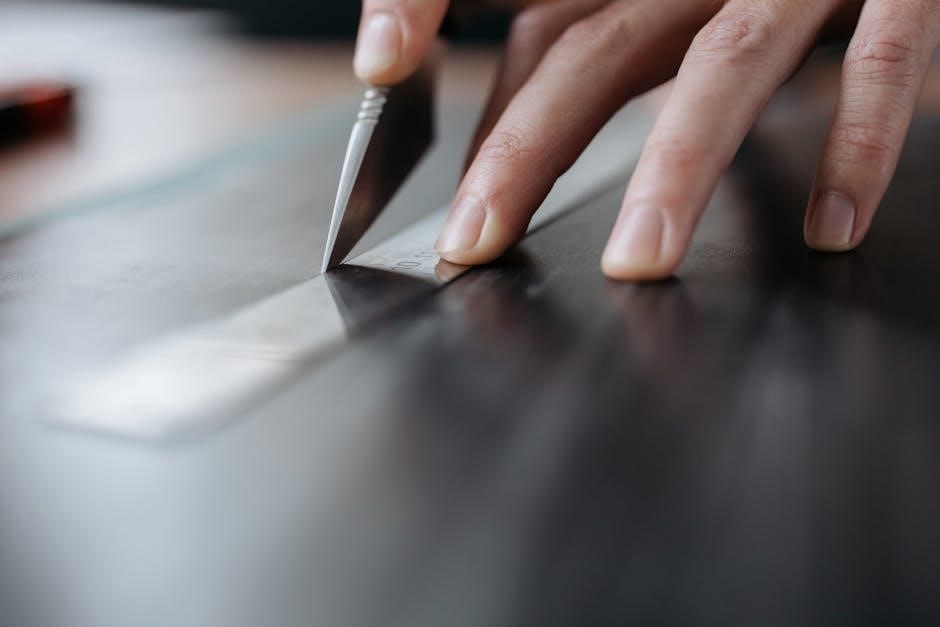
While not strictly necessary, a notebook and pen are useful for recording measurements systematically, preventing errors and facilitating comparisons across different brands. Consider a clothing ruler for smaller measurements like sleeve cuff width.
Finally, wear a well-fitting, thin shirt during measurement to simulate how a dress shirt will fit, avoiding bulky layers that could distort results. These simple tools empower you to achieve a perfect fit.

Key Measurements for a Dress Shirt
Essential dress shirt measurements include collar, neck, sleeve length, wrist, shoulder width, chest circumference, and back length – all vital for a tailored fit.
Collar Size: Determining the Right Fit
Collar size is paramount for a comfortable and aesthetically pleasing dress shirt fit. It directly impacts how the shirt looks when buttoned and whether you can comfortably wear a tie. Measuring accurately is crucial, as an ill-fitting collar can ruin the entire shirt’s appearance.
To determine your collar size, use a flexible measuring tape. Measure around the base of your neck, keeping the tape comfortably snug – not too tight, and not too loose. Ensure the tape is level and doesn’t angle up or down. Round up to the nearest half-inch if your measurement falls between sizes.
Generally, a properly fitted collar allows you to comfortably slip two fingers between your neck and the collar when buttoned. Remember that collar size is often expressed in inches. Online retailers like Lulus and Macy’s emphasize the importance of checking their specific size charts, as variations can occur between brands. A well-fitted collar enhances your overall style and comfort.
Neck Measurement: The Foundation of Collar Size

The neck measurement serves as the cornerstone for determining your ideal dress shirt collar size. Accuracy here is non-negotiable, as it dictates comfort and the overall appearance of the shirt. A precise neck measurement ensures the collar isn’t too constricting or overly loose.
Begin by standing upright and relaxing your shoulders. Wrap a flexible measuring tape around the thickest part of your neck, typically just below your Adam’s apple. Maintain a comfortable snugness – the tape should lie flat against your skin without compressing it. Avoid pulling the tape too tight or leaving it too slack.
Record the measurement in inches. If your measurement falls between sizes, it’s generally recommended to round up to the next half-inch. Remember to consult brand-specific size charts, as Nordstrom and other retailers may have slight variations. A correct neck measurement is the essential first step towards a perfectly fitted dress shirt.
Sleeve Length: From Shoulder to Cuff
Determining accurate sleeve length is crucial for a polished and professional look. The sleeve should extend to your wrist bone, allowing approximately half an inch of your shirt cuff to extend beyond your jacket sleeve. This subtle detail elevates your overall style.
To measure, put on a well-fitting shirt and stand with your arms relaxed at your sides. Have a helper measure from the center back of your neck, across your shoulder, and down the outside of your arm to your wrist bone. Keep your arm slightly bent during measurement.
Record the measurement in inches. Consider that different brands, like those found at Lulus or Macy’s, may vary slightly in their sleeve length cuts. It’s often better to err on the side of slightly longer, as sleeves can be easily altered by a tailor for a perfect fit.
Wrist Measurement: Ensuring Cuff Comfort
A comfortable wrist fit is often overlooked, yet it significantly impacts the overall feel of a dress shirt. Too tight, and it restricts movement; too loose, and it appears sloppy; Accurate wrist measurement ensures a proper fit, especially when wearing a suit or jacket.
To measure your wrist, use a flexible measuring tape. Wrap it snugly around your wrist bone, where you would typically wear a watch. Don’t pull the tape too tight, as this will result in an inaccurate measurement. Record the measurement in inches.
Most dress shirts come in standard wrist sizes. If your measurement falls between sizes, it’s generally recommended to choose the larger size for comfort. Remember that cuff links will add slight bulk, so factor that in if you plan to wear them regularly. Nordstrom offers a variety of cuff styles to complement your fit.
Shoulder Width: Across the Back
Determining shoulder width is crucial for a shirt that drapes correctly and avoids pulling or bunching. This measurement impacts how the shirt sits across your upper back and affects overall comfort and appearance. A proper fit ensures a clean silhouette;
To measure shoulder width, you’ll need a flexible measuring tape and ideally, assistance. Measure across your back from the outermost point of one shoulder (where a shoulder seam would sit) to the outermost point of the other shoulder; Keep the tape straight and level.
Ensure your arms are relaxed and down at your sides during measurement. This prevents the tape from being stretched or distorted. Compare your measurement to brand-specific size charts, as shoulder width can vary significantly. Lulus’ modern designs prioritize a flattering fit, so accurate measurements are key.
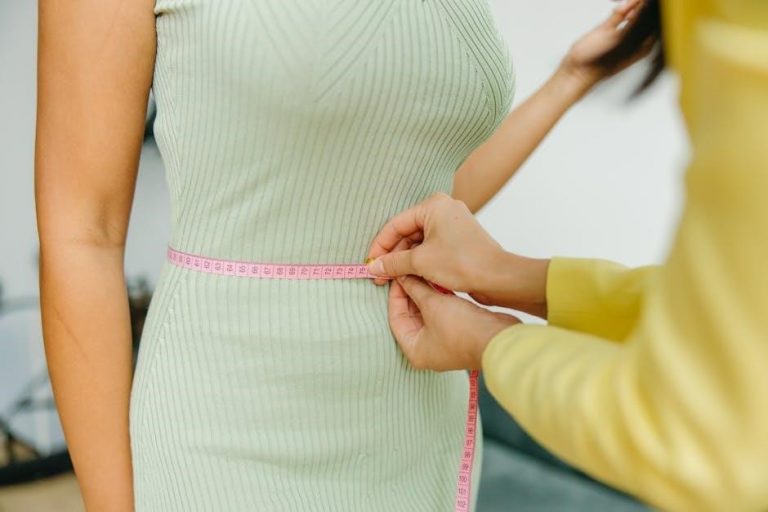
Chest Measurement: Circumference and Fit
Accurately measuring your chest is paramount for a comfortable and flattering dress shirt fit. This measurement dictates how the shirt will button and move with you, impacting both style and ease of wear. A well-fitted chest ensures a polished look, avoiding tightness or excessive looseness.
Wrap a flexible measuring tape around the fullest part of your chest, keeping it level and under your armpits; Breathe normally and don’t pull the tape too tight; it should be snug but not constricting. Record the measurement in inches or centimeters.
Remember that chest measurements are often used in conjunction with other measurements like shoulder width to determine the best size. Nordstrom offers a wide range of sizes, so precise measurements are essential for finding the perfect fit. Consider whether you prefer a slim or regular fit, as this will influence your ideal chest measurement.
Back Length: From Collar to Hem
Determining your back length – the distance from the base of your collar to the desired hemline – is crucial for achieving a proportionate and stylish dress shirt fit. This measurement impacts how the shirt hangs and whether it will properly cover your back and seat.
To measure, have someone assist you. Start at the prominent bone at the base of your neck (where a collar would sit) and measure straight down your back to where you want the shirt’s hem to fall. A common length is around 30-32 inches, but this varies based on height and preference.
Consider the style of shirt you’re purchasing. Longer lengths are suitable for tucking in, while shorter lengths work well untucked for a more casual look. Lulus offers various dress lengths, making accurate back length measurement vital for a flattering silhouette.

Understanding Size Charts
Size charts are essential for translating your body measurements into the correct shirt size, varying between brands and retailers like Macy’s and Nordstrom.
Always consult the specific chart before purchasing, noting US standard and international conversions for an optimal fit.
Standard US Size Charts
US dress shirt sizing typically revolves around two primary measurements: collar size and sleeve length, though chest and shoulder measurements play a vital role in overall fit. Collar sizes are measured in inches and generally range from 14 to 17.5 inches, corresponding to neck measurements. A standard size progression is 14, 14.5, 15, 15.5, 16, 16.5, and 17 inches, with half-inch increments offering more precise fits.
Sleeve length, also in inches, is determined by measuring from the center back of the neck, over the shoulder, and down to the wrist bone. Common sleeve lengths range from 30 to 37 inches. It’s crucial to remember these are starting points; variations exist between manufacturers.
A typical US size chart might look like this: 15-inch collar often pairs with a 34/35-inch sleeve, while a 16-inch collar might correspond to a 35/36-inch sleeve. However, always prioritize individual measurements over assumed pairings. Online retailers like Lulus and department stores like Nordstrom usually provide detailed size charts alongside each product.
International Size Conversions
Navigating international dress shirt sizes requires understanding the differing standards used globally. US sizes don’t directly translate to European, Asian, or UK measurements. European sizes are often numerically based, with a smaller number indicating a smaller size; a US 15.5-inch collar might equate to a European 39 or 40, depending on the brand.
Asian sizing, particularly from manufacturers in China and Japan, tends to run smaller than US sizes. You may need to add 1-2 inches to your collar size when ordering from these regions. UK sizes are similar to US sizes, but slight variations can occur.
Always consult a specific brand’s conversion chart, as discrepancies are common. Websites like Nordstrom often provide these charts. Remember to convert both collar and sleeve length for an accurate fit. Utilizing online conversion tools can be helpful, but verifying with the retailer’s chart is essential to avoid sizing errors and ensure a comfortable, stylish shirt.
Brand-Specific Size Variations
Even within a single region, dress shirt sizing isn’t standardized; significant variations exist between brands. A size 15.5 collar at one retailer might fit differently than the same size at another. This stems from differing cut styles – slim fit, regular fit, and classic fit – and unique design philosophies.

Luxury brands often have a more tailored, slimmer cut, requiring you to potentially size up. Conversely, brands focusing on comfort may have a looser, more generous fit. Lulus, Macys, and Nordstrom all carry diverse brands, each with its own sizing nuances.
Always prioritize checking the specific brand’s size chart before purchasing. Pay attention to details like shoulder width and chest measurements, not just collar and sleeve length. Reading customer reviews can also provide valuable insights into how a particular brand’s shirts fit in reality, helping you make an informed decision and avoid sizing disappointments.

Taking Your Measurements – A Step-by-Step Guide
Precise self-measurement is key to a great fit; enlist a friend for accuracy! Use a flexible tape measure and follow detailed guides for optimal results.
Avoid common errors by measuring over clothing and ensuring the tape is snug, not tight.
Getting Help with Measurements

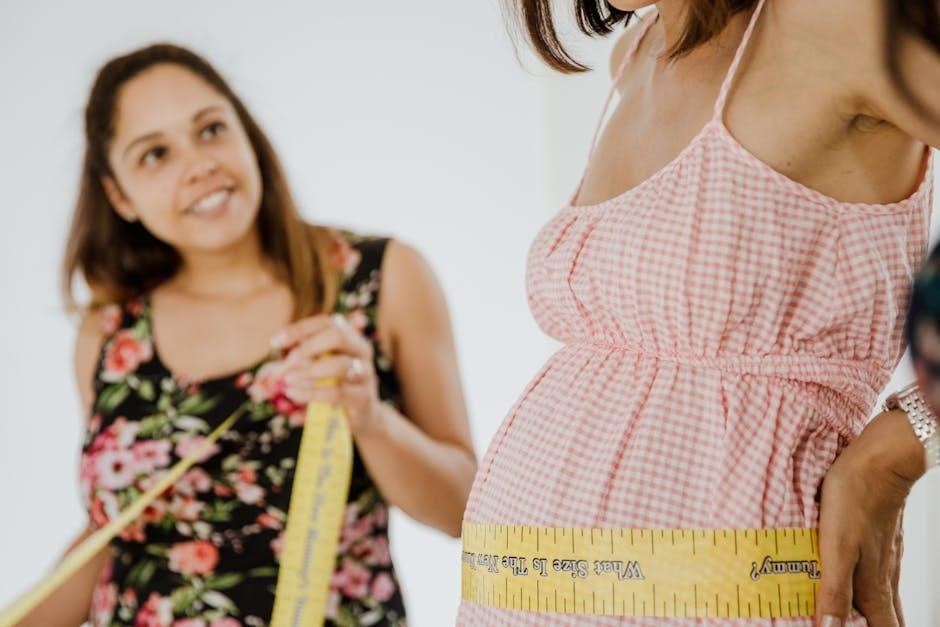
Navigating dress shirt measurements can be tricky, and seeking assistance is often the best approach for achieving a truly accurate fit. While self-measurement is possible, having a friend, family member, or professional tailor assist significantly reduces the risk of errors.
A second pair of hands ensures the tape measure remains level and snug – not too tight, not too loose – around your body. They can also reach areas that are difficult to access independently, like the middle of your back for shoulder width.
Consider visiting a reputable tailor or menswear store. Professionals are experienced in taking precise measurements and can offer personalized advice based on your body type and desired shirt style. They can also explain how different fits (slim, regular, etc.) will translate to your measurements.
Don’t hesitate to ask questions! Understanding why certain measurements are taken and how they impact the shirt’s fit empowers you to make informed decisions when shopping, whether online or in-store. Remember, a little help can save you the hassle of returns and ensure you consistently choose shirts that look and feel fantastic.
Common Measurement Mistakes to Avoid
Accuracy is paramount when taking dress shirt measurements, and several common errors can easily skew results. One frequent mistake is pulling the tape measure too tightly, especially when measuring the chest or neck; this leads to an artificially inflated number and a shirt that feels constricting.
Conversely, a loose tape measure yields measurements that are too small, resulting in a shirt that’s uncomfortably snug. Always ensure the tape is snug but allows for easy breathing. Another error is measuring over clothing – always measure directly against your skin or light undergarments.
Failing to stand naturally is also a problem; slouching or puffing out your chest alters measurements. Maintain good posture throughout the process; Finally, inconsistent measuring points can cause discrepancies. Always start and end the tape measure at the same anatomical landmarks each time.
Double-checking each measurement and comparing it to a reliable size chart is crucial. Avoiding these pitfalls ensures a more accurate fit and a more satisfying shopping experience.
Special Considerations
Body shape and desired fit significantly impact shirt selection; slim-fit shirts require precise measurements, while regular fits offer more leeway for comfort and movement.
Consider your build when choosing styles, ensuring a flattering silhouette and unrestricted range of motion for all-day wear.
Slim Fit vs. Regular Fit Measurements
Understanding the difference between slim and regular fit is paramount for achieving the desired aesthetic. Slim fit shirts are tailored closer to the body, demanding more precise measurements, particularly in the chest, waist, and biceps.
Expect a reduced amount of fabric throughout, creating a modern, streamlined silhouette. When measuring for a slim fit, ensure your chest measurement is accurate, as this dictates the shirt’s overall snugness. A regular fit, conversely, provides more room and comfort.
These shirts have a looser cut through the chest, waist, and sleeves, offering greater freedom of movement. Measurements can be slightly more forgiving, but still crucial for a polished look.
Generally, add 1-2 inches to your chest measurement when selecting a regular fit compared to a slim fit. Consider shoulder width as well; slim fits often have narrower shoulders, while regular fits offer a more relaxed shoulder line. Ultimately, your body type and personal preference will guide your choice.
Measurements for Different Body Types

Adapting measurements to your unique physique is key to a flattering fit. For athletic builds with broader shoulders and chests, prioritize shoulder and chest measurements, potentially sizing up to accommodate the broader upper body.
Individuals with larger waists may need to focus on waist measurements and consider shirts with a more generous cut or those designed for a “relaxed” fit. Taller individuals require accurate back length measurements to ensure the shirt hem falls at the appropriate length.
Shorter torsos may necessitate shirts with a shorter back length or the possibility of tailoring. Those with a prominent stomach should prioritize chest and waist measurements, opting for shirts with a bit of stretch or a classic fit.
Remember, off-the-rack shirts rarely fit perfectly; tailoring is often necessary to achieve a truly customized and polished appearance. Don’t hesitate to seek professional assistance for precise measurements and alterations.