Alarm․com Thermostat User Manual: A Comprehensive Guide
This manual provides detailed instructions for Alarm․com smart thermostats (ADC-T2000, T3000, T40K-HD),
covering setup, operation, troubleshooting, and maintenance for optimal performance and energy savings․
From initial activation to advanced diagnostics, this guide empowers users to effectively manage their home climate control systems․
Alarm․com Smart Thermostats represent a significant advancement in home comfort and energy management, seamlessly integrating with your existing Alarm․com security system․ These thermostats – including models ADC-T2000, ADC-T3000, and ADC-T40K-HD – offer remote control, intelligent scheduling, and detailed energy usage reporting, all accessible through the Alarm․com mobile app or web portal․
Unlike traditional thermostats, Alarm․com Smart Thermostats learn your heating and cooling preferences, automatically adjusting temperatures to maximize comfort while minimizing energy consumption․ They also provide valuable insights into your home’s HVAC system performance, alerting you to potential issues before they escalate․ This proactive approach helps maintain system efficiency and potentially reduce repair costs․
This guide will walk you through every aspect of utilizing your Alarm․com Smart Thermostat, from initial setup and activation to advanced troubleshooting and maintenance․ Whether you’re a first-time smart home user or an experienced enthusiast, this manual will equip you with the knowledge to unlock the full potential of your device․
Thermostat Models: ADC-T2000, ADC-T3000, ADC-T40K-HD
Alarm․com offers a range of smart thermostat models designed to suit various home heating and cooling systems․ The ADC-T2000 is a foundational model, providing essential smart features like remote control and scheduling, and is known for its reliable battery performance․ The ADC-T3000 builds upon this foundation with an upgraded display and enhanced connectivity options, offering a more refined user experience․

For those seeking the most advanced features, the ADC-T40K-HD delivers a high-definition touchscreen display, geofencing capabilities, and advanced energy reporting․ This model is particularly well-suited for homes with complex HVAC configurations․ All three models share core functionalities, including integration with the Alarm․com platform and compatibility with various system types – conventional, heat pump, and dual fuel․
This manual covers the operation of all three models, highlighting any specific differences where applicable․ Regardless of which model you own, you’ll find detailed instructions to help you maximize its potential․
Understanding the Thermostat Interface
The Alarm․com thermostat interface is designed for intuitive control of your home’s climate․ The main screen typically displays the current temperature, setpoint temperature, and operating mode (Heat, Cool, Auto, Off)․ ADC-T2000 models feature basic button controls, while ADC-T3000 and ADC-T40K-HD boast touchscreen displays for easier navigation․
Key icons indicate system status, such as fan operation, heating/cooling activation, and connectivity to the Alarm․com system․ Touchscreen models allow direct temperature adjustments by tapping the up or down arrows․ Menus provide access to scheduling, system settings, and advanced features․ Understanding these elements is crucial for effective operation․
The interface also displays battery level and alerts for maintenance needs․ Familiarizing yourself with the layout and icons will streamline your experience and enable efficient climate management․
Initial Setup and Activation

Before using your Alarm․com thermostat, proper setup and activation are essential․ Begin by physically installing the thermostat, ensuring correct wiring according to your system type (conventional, heat pump, or dual fuel)․ Refer to the installation guide for specific wiring diagrams․ Once installed, power on the thermostat and follow the on-screen prompts․
The thermostat will guide you through connecting to your home’s Wi-Fi network․ Ensure a stable connection for seamless integration with the Alarm․com system․ You’ll need your Alarm․com account credentials to complete the activation process․ This links the thermostat to your security system and enables remote control․
Activation may involve a verification step through the Alarm․com mobile app or website․ Successful activation confirms the thermostat is online and ready for use․
Connecting to the Alarm․com System
Seamless integration with the Alarm․com system unlocks the full potential of your smart thermostat․ This connection enables remote control, scheduling, and advanced features through the Alarm․com mobile app or web portal․ Ensure your Alarm․com account is active and you have the necessary login credentials․
The connection process typically occurs during the initial thermostat activation․ However, if the thermostat wasn’t automatically linked, you can manually connect it through your Alarm․com account settings․ Navigate to the “Devices” section and select “Add Device”․ Follow the on-screen instructions, which may involve scanning a QR code or entering the thermostat’s serial number․
A successful connection is indicated by the thermostat appearing in your Alarm․com device list, allowing for remote temperature adjustments and system control․
Adding a Thermostat to Your Account
To add your Alarm․com thermostat to your account, begin by ensuring your system is online and you have administrator access․ Within the Alarm․com mobile app or web portal, navigate to the “Devices” section․ Select the “Add Device” option and choose “Thermostat” from the device category list․
You’ll be prompted to enter the thermostat’s unique serial number, typically found on the device itself or its original packaging․ Alternatively, some models support QR code scanning for quicker identification․ Follow the guided setup process, which may involve naming the thermostat and assigning it to a specific zone or room within your home․
Once added, the thermostat will appear in your device list, allowing for remote control and integration with other Alarm․com smart home features․
Basic Operation: Setting Temperature
Adjusting the temperature with your Alarm․com thermostat is straightforward․ Through the mobile app or web portal, locate the thermostat control panel․ You’ll see the current room temperature and the setpoint temperature․ Use the plus (+) and minus (-) buttons to increase or decrease the desired temperature․
The thermostat supports different modes: Heat, Cool, Auto, and Off․ Select the appropriate mode based on your needs․ In “Auto” mode, the thermostat automatically switches between heating and cooling to maintain the setpoint․ You can also toggle between Fahrenheit and Celsius within the settings menu․
For immediate adjustments, utilize the “Hold” function to override scheduled settings temporarily․ This is useful for short-term comfort preferences․
Scheduling Temperature Changes
Alarm․com thermostats excel in energy efficiency through customizable scheduling․ Access the scheduling feature via the mobile app or web portal․ You can create unique schedules for weekdays and weekends, or even individual days․ Define specific time periods and corresponding temperatures for each day․
For example, you might schedule a lower temperature overnight while you sleep, and a warmer temperature before you wake up․ Similarly, you can reduce heating or cooling during work or school hours․ The system supports multiple schedule entries per day, allowing for granular control․
Utilize the “Smart Quick Adjust” feature for automated adjustments based on occupancy and weather conditions, further optimizing energy usage․
System Type Identification
Accurate system type identification is crucial for proper Alarm․com thermostat operation․ The thermostat needs to know if it’s connected to a conventional heating and cooling system, a heat pump, or a dual fuel system․ Incorrect identification can lead to inefficient operation or even damage․
During the initial setup, the thermostat will guide you through a series of questions to determine your system type․ Pay close attention to these prompts and answer honestly․ Consider your existing HVAC setup: does it have a separate auxiliary heat source? Does it reverse for cooling?
If unsure, consult your HVAC technician or refer to your system’s documentation․ Proper identification ensures the thermostat controls your heating and cooling effectively․

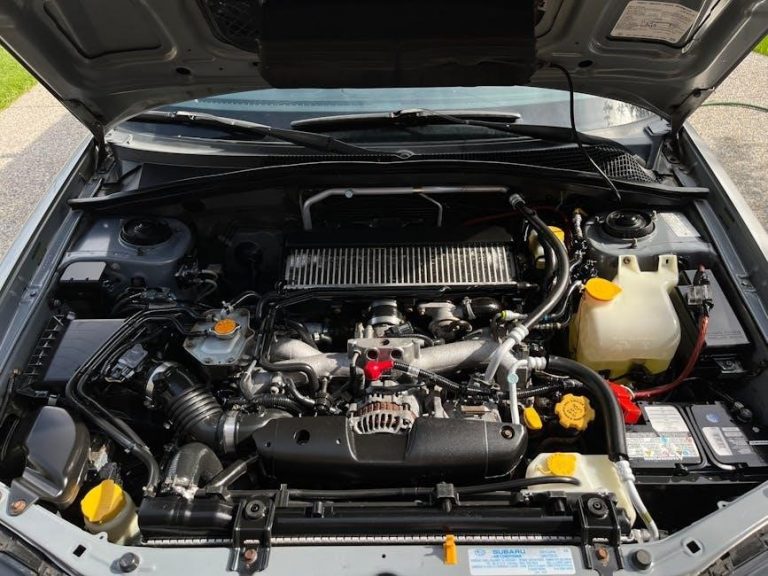
Conventional Heating and Cooling Systems
For conventional systems, your Alarm․com thermostat operates as a central control point for both heating and cooling․ These systems typically utilize a furnace for heat and an air conditioner for cooling, each with its own dedicated power source and controls․
The thermostat manages these components by switching between heating and cooling modes based on your set temperature and schedule․ Ensure proper wiring during installation, connecting the thermostat to the appropriate terminals for heating (W) and cooling (Y)․
Basic operation involves setting desired temperatures for both heat and cool, and the thermostat will automatically activate the corresponding system to maintain those levels․ Regularly check air filters for optimal performance․
Heat Pump Systems
Heat pump systems offer both heating and cooling from a single unit, utilizing refrigerant to transfer heat․ Alarm․com thermostats are fully compatible, but require specific configuration for optimal performance․ Identifying your system type is crucial; heat pumps often have an auxiliary (AUX) heat source for supplemental warmth in colder temperatures․
The thermostat controls the reversing valve to switch between heating and cooling modes․ Proper wiring is essential, connecting to terminals for the compressor (Y), reversing valve (O/B), and auxiliary heat (AUX)․ Pay attention to O/B settings – these determine whether the reversing valve activates on an ‘O’ or ‘B’ signal․
Monitor heat pump operation and ensure the AUX heat engages during extreme cold to prevent the system from overworking․
Dual Fuel Systems
Dual fuel systems combine a heat pump with a gas furnace, offering efficient heating in moderate temperatures and reliable warmth during extreme cold․ Alarm․com thermostats expertly manage these systems, automatically switching between heat sources for optimal comfort and cost savings․ Correct configuration is paramount, defining the balance point temperature where the system transitions from heat pump to furnace․
The thermostat controls both the heat pump (Y, O/B) and the furnace (W), intelligently coordinating their operation․ Proper wiring ensures seamless switching, and accurate balance point settings maximize efficiency․ Monitor the system’s behavior to confirm the transition occurs as expected, and adjust settings as needed․
Troubleshooting often involves verifying wiring and balance point temperature settings․
Troubleshooting: Heating Issues
Encountering heating problems with your Alarm․com thermostat? Several common issues can arise, ranging from a complete lack of heat to insufficient warmth․ Begin by verifying the thermostat is set to “Heat” mode and the desired temperature is higher than the current room temperature․ Check your system type – is it conventional, heat pump, or dual fuel? This dictates the troubleshooting steps․
Common problems include no heat at all, heat turning on but blowing cold air, or a heat pump that won’t run․ Auxiliary heat malfunctions are also frequent․ Systematic diagnosis is key; start with simple checks like the circuit breaker and fuel supply (for gas furnaces)․
Refer to specific sections for detailed solutions to each issue, including wiring checks and balance point adjustments․
No Heat: Common Causes and Solutions
If your Alarm․com thermostat isn’t producing heat, several factors could be at play․ First, ensure the thermostat is correctly set to “Heat” mode with a temperature above the current room temperature․ Verify the system type – conventional, heat pump, or dual fuel – as solutions differ․ Check the circuit breaker for the furnace or heating system; a tripped breaker is a common culprit․
Low fuel levels (gas or oil) can also prevent heating․ Inspect wiring connections at the thermostat and furnace, ensuring they are secure․ A faulty flame sensor or igniter can also cause no-heat situations․ Try manually changing the temperature on the thermostat to trigger the system․
If issues persist, consult a qualified HVAC technician for professional diagnosis and repair․
Heat Turns On, But No Warm Air
If your Alarm․com thermostat activates the heating system, but you don’t feel warm air circulating, several issues could be responsible․ First, check the blower fan; ensure it’s operating correctly and distributing air throughout your home․ A clogged air filter is a frequent cause, restricting airflow and reducing heating efficiency․ Replace the filter with a clean one․
Inspect the ductwork for any blockages or disconnections that might prevent warm air from reaching vents․ A malfunctioning blower motor or capacitor could also be the problem․ Verify that dampers are open, allowing airflow to the intended rooms․
If the issue continues, professional HVAC inspection is recommended to diagnose and repair potential mechanical failures․
Heat Pump Not Running – Troubleshooting Steps
When your Alarm․com thermostat indicates a call for heat, but the heat pump doesn’t activate, begin by verifying the system type is correctly identified within the Alarm․com app․ Ensure the thermostat is set to “Heat” mode and the setpoint is higher than the current room temperature․ Check the circuit breaker for the heat pump; a tripped breaker will prevent operation․
Confirm the outdoor unit isn’t iced over, as this can trigger safety shutdowns․ Manually trigger the thermostat by adjusting the temperature to force a system check․ Verify Z-Wave network range if connectivity is suspect․
If problems persist, a professional HVAC technician should inspect the heat pump’s compressor, reversing valve, and electrical components․
AUX Heat Not Working – Diagnosis
If your Alarm․com thermostat’s auxiliary (AUX) heat isn’t functioning, first confirm it’s enabled within the thermostat settings and the Alarm․com app․ AUX heat typically activates when the heat pump can’t meet the heating demand, often during very cold temperatures․ Verify the outdoor temperature is low enough to trigger AUX heat activation․
Check the thermostat’s programming to ensure AUX heat isn’t inadvertently disabled during specific schedules․ Manually change the setpoint significantly above the current temperature to force AUX heat to engage for testing․ Inspect the electrical breaker dedicated to the AUX heat source․
If issues continue, a qualified HVAC technician should examine the AUX heat elements or gas burner for proper operation․
Troubleshooting: Cooling Issues
When encountering cooling problems with your Alarm․com thermostat, begin by verifying the system is set to “Cool” mode and the setpoint is higher than the current room temperature․ If the air conditioner isn’t turning on, check the circuit breaker and ensure the thermostat has sufficient battery power․ Confirm the outdoor unit is receiving power and isn’t obstructed․
If the A/C turns on but delivers no cool air, inspect the air filter for blockage and check for frozen evaporator coils․ For heat pump systems, ensure the reversing valve is functioning correctly․ A heat pump not running in cooling mode may indicate a compressor issue or refrigerant leak․

Remember to consult a qualified HVAC technician for complex cooling system repairs․
Air Conditioner Not Turning On
If your air conditioner fails to turn on with your Alarm․com thermostat, the first step is to verify the thermostat is set to “Cool” mode and the desired temperature is set appropriately higher than the current room temperature․ Next, check the circuit breaker dedicated to the air conditioning unit to ensure it hasn’t tripped․ Confirm the thermostat has sufficient battery power or is properly receiving power from the HVAC system․
Inspect the outdoor unit to confirm it’s receiving power and isn’t blocked by debris․ A faulty capacitor or contactor within the outdoor unit can also prevent startup․ If these initial checks don’t resolve the issue, consider a professional HVAC technician for further diagnosis․
A/C Turns On, But No Cool Air
If your air conditioner activates but doesn’t produce cool air, several factors could be at play․ First, check the air filter – a clogged filter restricts airflow, reducing cooling efficiency․ Ensure the outdoor unit isn’t obstructed by plants or debris, hindering heat dissipation․ Verify the condenser fan is running; if not, a motor or capacitor issue may exist․
Low refrigerant levels are a common cause, requiring professional attention․ Inspect ductwork for leaks or disconnections, allowing cool air to escape․ A frozen evaporator coil can also prevent cooling; try switching the system to “Fan Only” to thaw it․ If the problem persists, consult an HVAC technician for a thorough assessment․
Heat Pump Not Running (Cooling Mode)
When your heat pump fails to operate in cooling mode, begin by verifying the thermostat is set to “Cool” and the desired temperature is below the current room temperature․ Check the outdoor unit to ensure the fan is running; a non-operational fan indicates a potential motor or capacitor failure․ Inspect the circuit breaker for the heat pump – a tripped breaker will halt operation․
Low refrigerant levels can prevent the heat pump from functioning correctly, necessitating professional service․ A frozen evaporator coil might also be the culprit; switch to “Fan Only” to defrost it․ Confirm the reversing valve is functioning properly, as this component switches between heating and cooling․ If issues continue, contact a qualified HVAC technician for diagnosis and repair․
Fan Operation Troubleshooting
Addressing fan issues with your Alarm․com thermostat begins with verifying the fan setting․ Ensure it’s not set to “Auto” if you desire continuous airflow․ If the fan runs constantly, check the thermostat’s schedule for unintended settings or a stuck relay within the HVAC system․ A malfunctioning thermostat could also be the cause, requiring a reset or replacement․
When the fan doesn’t turn on, first confirm the thermostat is calling for fan operation during heating or cooling․ Inspect the circuit breaker dedicated to the HVAC system․ A faulty fan motor or capacitor is a common issue, needing professional attention․ Power cycling the thermostat can sometimes resolve minor glitches; remove it from the wall and re-seat it․
Fan Runs Constantly
If your Alarm․com thermostat’s fan operates continuously, several factors could be at play․ Begin by checking the thermostat’s settings; ensure the fan isn’t inadvertently set to “On” instead of “Auto․” Review your programmed schedule for any unexpected fan activation times․ A stuck relay within your HVAC system’s control board can also cause this issue, requiring professional diagnosis․
Furthermore, a malfunctioning thermostat itself might be the culprit, necessitating a reset or potential replacement․ Verify the thermostat is receiving the correct signals and isn’t experiencing internal errors․ Try manually changing the temperature to trigger a system cycle and observe the fan’s behavior․ If the problem persists, consult a qualified HVAC technician․
Fan Does Not Turn On
When the fan fails to activate with your Alarm․com thermostat, initial troubleshooting involves verifying the thermostat’s power supply and settings․ Ensure the fan is set to “Auto” and isn’t disabled within the thermostat’s programming․ Check the circuit breaker dedicated to your HVAC system to rule out a power interruption․ A disconnected wire or a faulty connection at the furnace or air handler can also prevent fan operation․
Manually triggering the thermostat by adjusting the temperature can help determine if the issue lies within the thermostat itself․ If the fan remains unresponsive, the fan motor might be defective or the capacitor could have failed, requiring professional repair․ Power cycling the thermostat by removing it from the wall and re-installing it can sometimes resolve minor glitches․
Battery Replacement and Maintenance
Maintaining your Alarm․com thermostat (ADC-T2000) involves periodic battery checks and replacements to ensure uninterrupted operation․ Low battery levels can lead to communication issues and inaccurate temperature readings․ The ADC-T2000 typically uses AA batteries, and the thermostat will display a low battery warning when replacement is needed․ Always use fresh, high-quality alkaline batteries for optimal performance․
To extend battery life, avoid frequent temperature adjustments and ensure the thermostat isn’t exposed to extreme temperatures․ Regularly cleaning the thermostat’s surface with a soft, dry cloth prevents dust buildup that can interfere with sensors․ Proper battery disposal is crucial; follow local regulations for recycling alkaline batteries․ Consistent maintenance contributes to the longevity and reliability of your smart thermostat․

ADC-T2000 Battery Replacement Guide
Replacing the batteries in your Alarm․com ADC-T2000 thermostat is a straightforward process․ First, gently remove the thermostat from its wall plate․ Locate the battery compartment on the back of the thermostat and open it – usually by sliding a latch․ Remove the old AA batteries, noting their orientation for correct replacement․ Insert new, high-quality alkaline AA batteries, matching the positive (+) and negative (-) terminals․
Ensure the batteries are securely seated before closing the battery compartment․ Reattach the thermostat to the wall plate․ The thermostat should automatically power on and reconnect to the Alarm․com system․ If it doesn’t, verify the batteries are correctly installed and the thermostat is within Z-Wave range․ Proper battery installation ensures continued, reliable operation․
Extending Battery Life
Maximizing the lifespan of your ADC-T2000 thermostat’s batteries is achievable with a few simple adjustments․ Reduce the frequency of temperature setpoint changes; frequent adjustments require more power․ Consider enabling the “Eco” mode when away for extended periods, as it minimizes system activity․ Ensure the thermostat isn’t exposed to direct sunlight or drafts, which can cause the system to work harder․
Verify the thermostat is securely mounted to the wall plate, ensuring a good connection․ Avoid using rechargeable batteries, as they often don’t provide the consistent voltage required․ Regularly check the Alarm․com app for low battery notifications and replace batteries promptly․ Following these tips will help you enjoy longer intervals between battery replacements․
Advanced Troubleshooting & Diagnostics
When standard troubleshooting steps fail, advanced diagnostics become crucial․ Address compressor delays by verifying proper wiring and refrigerant levels – consult a qualified HVAC technician․ Perform thorough wiring and jumper checks to ensure correct connections, referencing the installation guide․ Manually trigger the thermostat by adjusting the temperature setting to force system operation and identify potential issues․
Verify Z-Wave network range; weak signals can cause intermittent problems; Check for interference from other devices․ Review the Alarm․com system logs for error codes or unusual activity․ If problems persist, contact Alarm․com support or a professional HVAC technician for further assistance and detailed diagnostics․
Resolving Compressor Delays
Compressor delays are common, especially after short cycles, protecting the compressor from damage․ If delays are excessive, first verify the thermostat settings and schedule aren’t causing frequent on/off cycles․ Check the wiring connections to the compressor and contactor, ensuring they are secure and free from corrosion․ Confirm adequate refrigerant levels – low refrigerant can cause prolonged start-up times; this requires a qualified HVAC technician․
Consider the outdoor temperature; compressors may delay starting in extreme heat or cold․ Review Alarm․com’s system logs for error codes related to compressor operation․ If the issue persists, consult a professional HVAC technician for a comprehensive system evaluation and repair․
Addressing Wiring and Jumper Checks
Proper wiring is crucial for reliable thermostat operation․ Carefully inspect all wiring connections at the thermostat and HVAC unit, ensuring they are tight and correctly placed․ Verify the common (C) wire is securely connected, as this provides constant power․ Check for loose or corroded wires, replacing them if necessary․ Confirm correct jumper settings based on your system type (heat pump, conventional, dual fuel)․

Incorrect jumper configurations can cause malfunctions․ Refer to the thermostat’s wiring diagram and your HVAC system’s documentation․ If unsure, consult a qualified HVAC technician to avoid damaging the system․ Always power off the HVAC system before performing any wiring checks or adjustments․
Manually Triggering the Thermostat for Testing
To verify thermostat functionality, manually trigger operation by adjusting the setpoint temperature․ Increase the setpoint by 2-3 degrees to initiate heating, or decrease it to activate cooling․ Observe if the HVAC system responds within a reasonable timeframe (typically 5-10 minutes)․ This confirms basic communication between the thermostat and the system․
If the system doesn’t respond, power cycle the thermostat by briefly removing it from the wall plate and reinstalling․ Also, check the Alarm;com app for any error messages or connectivity issues․ Manually triggering helps isolate problems – is it a thermostat issue, or a system malfunction? Document your observations for troubleshooting․
Z-Wave Network Range Verification
Ensuring a strong Z-Wave signal is crucial for reliable thermostat operation․ Verify the thermostat’s proximity to the Alarm․com hub or a Z-Wave repeater device․ Signal strength can be affected by walls, appliances, and distance․ Check the Alarm․com app for the thermostat’s Z-Wave signal strength indicator – aim for a “Good” or “Very Good” reading․
If the signal is weak, consider adding a Z-Wave repeater closer to the thermostat․ Repeaters extend the network’s reach and improve communication․ Test by manually adjusting the thermostat and observing response time․ A delayed response suggests a weak signal․ Proper range verification ensures consistent control and avoids connectivity issues․