
Masterbuilt Smoker: A Comprehensive Guide
Masterbuilt smokers offer diverse models, requiring careful setup and software management. Troubleshooting guides and safety manuals are crucial, alongside understanding overcurrent relay settings.
Understanding Your Masterbuilt Smoker
Masterbuilt smokers represent a popular entry point into the world of pellet grilling and smoking, known for their digital control panels and relative ease of use. However, maximizing your experience requires understanding the core components and functionalities. These smokers utilize wood pellets as fuel, automatically fed into a firepot to generate heat and smoke.
Familiarize yourself with the digital controller, which manages temperature and smoke levels. The smoker’s construction, often featuring stainless steel components, contributes to durability and even heat distribution. Regularly consulting the Masterbuilt Owner’s Manual (available online with 52 pages) is essential for safe and effective operation.
Beyond the smoker itself, understanding the software – and potential troubleshooting steps for app issues or uninstallations – is increasingly important. Resources like the Program Install and Uninstall troubleshooter can assist with software-related problems. Prioritizing safety, as outlined in the Pellet Smoker Safety Guide, is paramount for a successful and enjoyable smoking experience.
Types of Masterbuilt Smokers
Masterbuilt offers a diverse range of smokers catering to various needs and budgets. Their lineup includes standard electric smokers, known for their digital control and ease of use, and more advanced models featuring WiFi connectivity for remote monitoring and control via a dedicated app. These apps, however, sometimes require repair or resetting, as noted in available resources.
Beyond basic electric models, Masterbuilt produces pellet smokers, utilizing wood pellets for authentic smoky flavor. These often incorporate features like built-in meat probes and precise temperature control. The market also includes comparisons to other brands like Traeger and Franklin BBQ smokers, highlighting the competitive landscape.
Understanding the specific features of your model – referencing the Owner’s Manual (52 pages) – is crucial. Whether you choose a compact unit for small-batch smoking or a larger capacity smoker for entertaining, proper setup and adherence to safety guidelines (Pellet Smoker Safety Guide) are essential for optimal performance.
Masterbuilt Digital Controller Overview
Masterbuilt’s digital controllers are central to their smoker’s functionality, enabling precise temperature management and consistent results. These controllers allow users to set desired smoking temperatures, often displayed in Fahrenheit, and monitor internal meat temperatures using integrated probes. Many models now feature WiFi connectivity, allowing control and monitoring through a smartphone app.
However, the app isn’t always flawless; resources suggest potential issues requiring app repair or even complete resetting. The controller’s interface typically includes buttons for power, temperature adjustment, and timer settings. Understanding these controls is vital for successful smoking.
Calibration is also key – ensuring the controller accurately reflects the smoker’s internal temperature. Troubleshooting guides are available for error codes, and understanding overcurrent relay settings can prevent operational issues. Proper controller function is paramount for achieving optimal smoke and flavor, making familiarity with its features essential.
Initial Setup and Seasoning
Before your first smoke, proper setup and seasoning are crucial for a Masterbuilt smoker. Begin by assembling the unit according to the owner’s manual – typically a 52-page document. Ensure all components are correctly installed and secured. Next, address software if applicable; occasionally, uninstalling and reinstalling the app may resolve connectivity issues, utilizing the Program Install and Uninstall troubleshooter if needed.
Seasoning involves “burning in” the smoker to create a protective layer and eliminate manufacturing residues. This process typically involves running the smoker at a high temperature (around 350°F) for several hours with a small amount of wood pellets. This initial burn-in helps establish a base flavor and prepares the smoker for optimal performance.
Regular cleaning and maintenance, as outlined in safety guides, are vital throughout the smoker’s lifespan, ensuring longevity and consistent results.
Seasoning Your Smoker: Step-by-Step
To effectively season your Masterbuilt smoker, start by ensuring it’s clean and assembled per the 52-page owner’s manual. Fill the hopper with a small amount of your chosen wood pellets – about 2-3 pounds is sufficient. Initiate a burn cycle, setting the digital controller to 350°F (175°C). Allow the smoker to run for approximately 3-4 hours without any meat inside.
During this process, you’ll notice smoke being produced; this is normal as the internal components burn off manufacturing residues. Monitor the temperature, aiming for consistency. After the initial burn, let the smoker cool completely. Repeat this process one or two more times for a more robust seasoning layer.
Addressing potential software glitches during setup, like app connectivity, might require a reinstall, utilizing troubleshooting tools if necessary. Proper seasoning is key for flavor and longevity.
Choosing the Right Wood Pellets
Selecting the appropriate wood pellets is paramount for achieving desired smoke flavor profiles in your Masterbuilt smoker. Different wood types impart unique tastes to your food. For a mild, sweet smoke, consider fruit woods like apple or cherry. Hickory and mesquite offer bolder, more traditional barbecue flavors, ideal for brisket or ribs.
Blends are also available, combining multiple wood types for complex tastes. Ensure the pellets are dry and stored properly to maintain optimal burn quality. Avoid pellets that are dusty or show signs of moisture. The quality of the pellets directly impacts temperature control and smoke production.
Referencing the smoker’s manual can provide guidance on pellet compatibility. Remember, consistent pellet quality contributes to a successful smoking experience, alongside proper software and controller calibration.
Pellet Types and Flavor Profiles
Masterbuilt smokers thrive on quality wood pellets, each offering a distinct flavor profile. Apple pellets deliver a fruity sweetness, excellent for poultry and pork. Cherry wood imparts a slightly tart, reddish hue and flavor, complementing both pork and beef.
Hickory is a classic barbecue choice, providing a strong, smoky flavor perfect for ribs and shoulders. Mesquite offers an even bolder, more intense smoke, best suited for larger cuts like brisket. Oak provides a medium-intensity smoke, versatile enough for almost any meat.
Blends, like competition blends, combine various woods for nuanced flavors. Consider the meat type and desired outcome when selecting pellets. Proper storage is vital to prevent moisture absorption, ensuring consistent smoke production and optimal performance alongside the smoker’s digital controller.
Masterbuilt Smoker Temperature Control
Masterbuilt digital controllers are central to precise temperature management. Achieving consistent temperatures is paramount for successful smoking. Initial calibration is crucial; discrepancies can arise, requiring adjustments to the controller settings for accurate readings.
Maintaining stable temperatures demands understanding your smoker’s behavior in varying weather conditions. Wind and ambient temperature significantly impact performance. Utilize the controller’s settings to compensate, adjusting pellet feed rates as needed. Monitoring the internal meat temperature with a separate probe is highly recommended.
Troubleshooting temperature fluctuations often involves checking pellet levels, ensuring proper airflow, and verifying the controller’s functionality. Software updates, if applicable, can improve performance. Consistent monitoring and minor adjustments are key to mastering temperature control.
Calibrating Your Digital Controller
Masterbuilt digital controllers may require calibration to ensure accurate temperature readings. Begin by running the smoker at a set temperature for an extended period – ideally several hours – allowing it to stabilize. Simultaneously, use a reliable, calibrated external thermometer placed near the meat probes.
Compare the controller’s displayed temperature with the external thermometer’s reading. If a discrepancy exists, access the controller’s calibration settings (refer to your owner’s manual for specific instructions). Adjust the offset value until the controller matches the external thermometer.
Repeat this process multiple times to confirm accuracy. Minor adjustments may be necessary over time due to environmental factors. Regularly verifying calibration ensures consistent and predictable smoking results. Remember to document your calibration settings for future reference.
Maintaining Consistent Temperatures
Achieving consistent temperatures is paramount for successful smoking. Avoid opening the smoker door frequently, as each opening causes temperature fluctuations. Ensure a tight seal on the door and any vents. External weather conditions significantly impact performance; shield the smoker from wind and direct sunlight.
Utilize a quality thermometer to monitor internal smoker temperature, independent of the digital controller. Regularly check pellet levels and add more as needed to maintain a steady fuel supply. Consider using a smoke tube for enhanced smoke flavor, but monitor it closely.

If temperature swings occur, make small adjustments to the controller setting. Avoid drastic changes. Preheating the smoker thoroughly before adding meat also contributes to stability. Consistent temperatures yield predictable results and superior smoked meats.

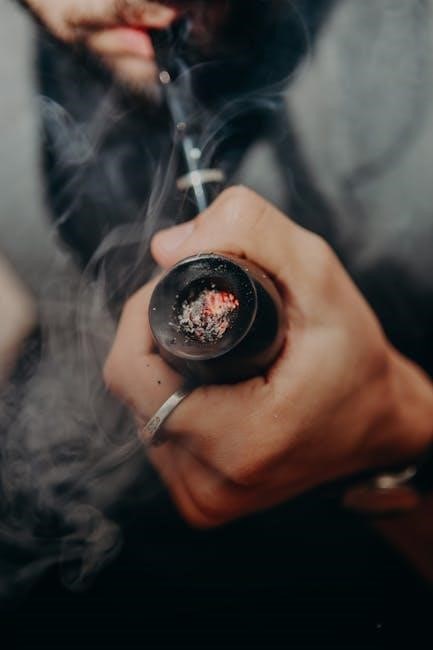
Smoking Meat: Essential Techniques
Proper meat preparation is key. Trim excess fat, but leave a thin layer for moisture. Brining or dry-rubbing enhances flavor and tenderness. Ensure meat reaches room temperature before smoking for even cooking. Place a water pan inside the smoker to maintain humidity, preventing drying.
Use a meat thermometer to monitor internal temperature, aiming for desired doneness. Avoid overcooking, as it leads to tough, dry results; The “stall” – a period of stable temperature during cooking – is normal; resist the urge to increase heat drastically.
Wrapping meat (“Texas Crutch”) can accelerate cooking and retain moisture, especially for larger cuts. Allow for resting after smoking, wrapped in butcher paper or foil, to redistribute juices. Patience and precise temperature control are vital for exceptional smoked meat.
Preparing Meat for Smoking
Begin by selecting quality cuts of meat, considering marbling for flavor and tenderness. Trimming excess fat is important, but leaving a thin layer helps retain moisture during the long smoking process. For tougher cuts like brisket or pork shoulder, consider overnight dry brining with a flavorful rub.
Injecting marinades can further enhance moisture and flavor penetration, especially for leaner cuts. Ensure the meat is fully thawed before preparation. Bring the meat to room temperature for about an hour before placing it in the smoker; this promotes even cooking.
Pat the meat dry with paper towels before applying rubs or marinades, allowing them to adhere better. Proper preparation significantly impacts the final result, ensuring a juicy and flavorful smoked product.
Popular Meat Choices & Cook Times
Brisket, a favorite, typically requires 12-18 hours at 225°F (107°C), achieving a tender, smoky result. Pork shoulder for pulled pork usually takes 8-12 hours at the same temperature. Ribs, whether baby back or spare ribs, generally need 5-7 hours, often utilizing the 3-2-1 method (3 hours smoking, 2 hours wrapped, 1 hour unwrapped).
Chicken cooks relatively quickly, around 3-4 hours at 250°F (121°C), while turkey can take 6-8 hours. These times are estimates and depend on meat thickness and smoker temperature consistency. Always use a meat thermometer to verify internal temperature for food safety.
Remember, these are guidelines; achieving perfect results requires practice and understanding your specific smoker. Consistent monitoring and adjustments are key to successful smoking.
Masterbuilt Smoker Recipes
Masterbuilt smokers excel with simple recipes, often requiring five ingredients or less. The “Complete Masterbuilt Smoker Cookbook” highlights this ease, focusing on family-friendly meals. Brisket recipes benefit from a dry rub of salt, pepper, and garlic powder, smoked low and slow for optimal tenderness.

For pulled pork, a similar rub works well, complemented by a flavorful mop sauce during the later stages of cooking. Experiment with wood pellet flavors – hickory for a classic smoky taste, or applewood for a sweeter profile. Remember to maintain consistent temperatures throughout the cook.
Numerous online resources offer detailed recipes and guidance, catering to both beginners and experienced smokers. Mastering basic techniques unlocks a world of culinary possibilities with your Masterbuilt smoker.

Brisket Recipe for Masterbuilt Smokers
Preparing the Brisket: Trim excess fat, leaving about ¼ inch. Generously apply a dry rub consisting of coarse black pepper, kosher salt, and garlic powder – a 2:1:1 ratio is a good starting point. Allow the brisket to sit with the rub for at least two hours, or preferably overnight, in the refrigerator.
Smoking Process: Preheat your Masterbuilt smoker to 225°F (107°C) using your preferred wood pellets (hickory or oak are excellent choices). Place the brisket directly on the smoker rack, fat-side up. Maintain a consistent temperature throughout the cook.
Cook Time & Finishing: Expect a cook time of approximately 12-18 hours, depending on the size of the brisket. Wrap the brisket in butcher paper once it develops a dark bark (around 6-8 hours). Continue smoking until the internal temperature reaches 203°F (95°C). Rest for at least two hours before slicing against the grain.
Pork Shoulder (Pulled Pork) Recipe
Preparation is Key: Begin by trimming any silver skin from the pork shoulder. Create a flavorful rub using paprika, brown sugar, garlic powder, onion powder, chili powder, cumin, salt, and pepper – adjust ratios to your preference. Thoroughly coat the pork shoulder with the rub, ensuring even coverage. Allow it to rest, refrigerated, for at least 4 hours, or ideally overnight, to allow the flavors to penetrate.
Smoking Process: Preheat your Masterbuilt smoker to 225°F (107°C) utilizing hickory or apple wood pellets for a classic pulled pork flavor. Place the pork shoulder directly on the smoker rack, fat-side up. Maintain a consistent temperature throughout the smoking process.
Cook Time & Finishing: Smoke for approximately 8-12 hours, or until the internal temperature reaches 203°F (95°C). Wrap in butcher paper during the stall to speed up the process. Rest for at least an hour before shredding with forks.
Cleaning and Maintenance
Regular upkeep is vital for your Masterbuilt smoker’s longevity. After each use, allow the smoker to cool completely. Remove and empty the grease tray, washing it with warm, soapy water. Scrape any built-up residue from the drip pan and smoker interior using a plastic scraper – avoid metal tools which can damage surfaces.
Deep Cleaning: Periodically, perform a more thorough cleaning. Remove the racks and wash them separately. Wipe down the interior with a damp cloth and mild detergent. Inspect the heating element for any debris and carefully remove it. Ensure all components are completely dry before reassembling.
Software & App: If applicable, keep the Masterbuilt app updated. Regularly check for and install any available software updates to ensure optimal performance and functionality. Address any error codes promptly using the provided troubleshooting guide.
Regular Cleaning Procedures
Consistent cleaning extends your Masterbuilt smoker’s life and maintains food safety. After every cook, once cooled, empty and wash the grease tray with warm, soapy water. Scrape accumulated grease and food residue from the drip pan and interior using a plastic scraper – avoid metal to prevent damage.
Weekly Maintenance: Once a week, remove and thoroughly clean the cooking racks. Wipe down the smoker’s exterior with a damp cloth. Inspect the wood pellet hopper for any blockages or buildup, ensuring smooth pellet flow. A vacuum can assist with pellet dust removal.
Monthly Deep Clean: Monthly, perform a deeper clean, including the heating element (when cool!). Check and clean the temperature sensor for accurate readings. Regularly updating the smoker’s software, if applicable, also contributes to optimal performance.
Troubleshooting Common Issues
Erratic temperatures are frequent concerns; calibrate the digital controller as outlined in the manual. If installation or uninstallation fails, utilize the Program Install and Uninstall Troubleshooter provided by Windows. Corrupted registry keys can often be repaired using this tool.
Software glitches may necessitate reinstalling the Masterbuilt app, or resetting it to factory settings. Error codes displayed on the controller require referencing the owner’s manual for specific solutions. Overcurrent relay issues often relate to power supply or wiring – consult a qualified electrician if needed;
Pellet feed problems can stem from blockages in the hopper or auger; ensure pellets are dry and free-flowing. If issues persist, consult the Masterbuilt support resources or online forums for assistance. Remember to check for software updates!
Error Codes and Solutions
Masterbuilt smokers utilize error codes to diagnose issues. Referencing the Owner’s Manual is paramount for accurate interpretation. Common codes relate to temperature sensor failures, auger malfunctions, or controller connectivity problems. A frequently encountered issue involves the overcurrent relay, often requiring a reset or inspection of the power supply.
If a code indicates a temperature sensor fault, verify the sensor’s connection and replace if necessary. Auger errors may necessitate clearing blockages within the pellet delivery system. Controller errors could require a software reset or, in severe cases, a controller replacement.
Always document the error code before attempting any repairs. Online Masterbuilt support forums can provide valuable insights from other users. Remember to disconnect the smoker from power before performing any maintenance or troubleshooting steps for safety.
Masterbuilt Smoker Safety Guide
Masterbuilt smokers, while convenient, require strict adherence to safety protocols. Always operate the smoker outdoors, away from flammable materials, and ensure adequate ventilation. Never leave a smoking smoker unattended, and keep children and pets at a safe distance.
Exercise extreme caution when handling hot surfaces, utilizing heat-resistant gloves and tools. Regularly inspect the power cord for damage, and avoid using extension cords if possible. Be mindful of the hot pellets and ash, disposing of them properly in a metal container with a lid.
Understand the overcurrent relay settings and their importance in preventing electrical hazards. Refer to the Pellet Smoker Safety Guide for detailed instructions. Disconnect the smoker from power before cleaning or performing maintenance. Prioritize safety to enjoy a worry-free smoking experience.
Overcurrent Relay Settings & Safety
Masterbuilt smokers utilize an overcurrent relay as a critical safety feature, protecting against electrical issues. This relay trips when the smoker draws excessive power, preventing potential fires or damage to the unit. Understanding and correctly setting this relay is paramount for safe operation.
The Overcurrent Relay Settings Guide provides specific instructions for your model. Incorrect settings can lead to nuisance tripping (relay shutting off prematurely) or, conversely, insufficient protection. Always consult the manual before adjusting these settings.
If the relay frequently trips, investigate potential causes like a faulty power supply, damaged wiring, or a malfunctioning temperature sensor. Never bypass or disable the overcurrent relay – it’s a vital safety component. Prioritize electrical safety and consult a qualified technician if you’re unsure about any adjustments.
Uninstalling Masterbuilt Smoker Software (If Applicable)
If your Masterbuilt smoker utilizes companion software for control or monitoring, proper uninstallation is crucial when troubleshooting or switching devices. Begin by attempting removal through the Windows “Apps & Features” menu – select the app and choose “Uninstall”. Alternatively, access uninstallation via “Start > Settings > Apps > Apps & features”.
Should standard methods fail, utilize the “Program Install and Uninstall Troubleshooter” built into Windows. This tool automatically repairs issues blocking program removal and addresses corrupted registry keys. For persistent problems, especially those indicating malware, run a comprehensive scan with Windows Security.
Remember to completely remove all associated files and folders after uninstalling the software. A clean removal ensures no conflicts arise during future installations or when using alternative control methods. Always refer to the software’s documentation for specific uninstallation instructions.
Repairing/Resetting Masterbuilt Smoker App
When encountering issues with the Masterbuilt smoker app, attempting a repair or reset is often the first step towards resolution. Within the app settings (if available), look for an “Advanced options” menu. This may contain a “Repair” function designed to fix minor software glitches. If a repair option isn’t present, or doesn’t resolve the problem, a “Reset” function is the next course of action.
Resetting the app will restore it to its default settings, effectively clearing any corrupted data or configurations. Be aware that this may require re-pairing the app with your smoker and re-entering any personalized settings. If issues persist after a reset, consider uninstalling and reinstalling the app entirely.
Before reinstalling, ensure your smoker’s firmware is up-to-date. A compatible app version is crucial for optimal performance. Regularly check for app updates in your device’s app store.